

Tenant Management
Every business on your platform is a tenant — a company with its own CRM on its own subdomain. This is where you see them all, add one by hand, edit their details, or switch one off.
What you'll learn
- How to read the tenant list
- How to create a tenant yourself
- How to block a tenant, and what blocking does
- How to remove a tenant for good
The tenant list
Open Tenants in the sidebar. Every tenant is listed, newest first.
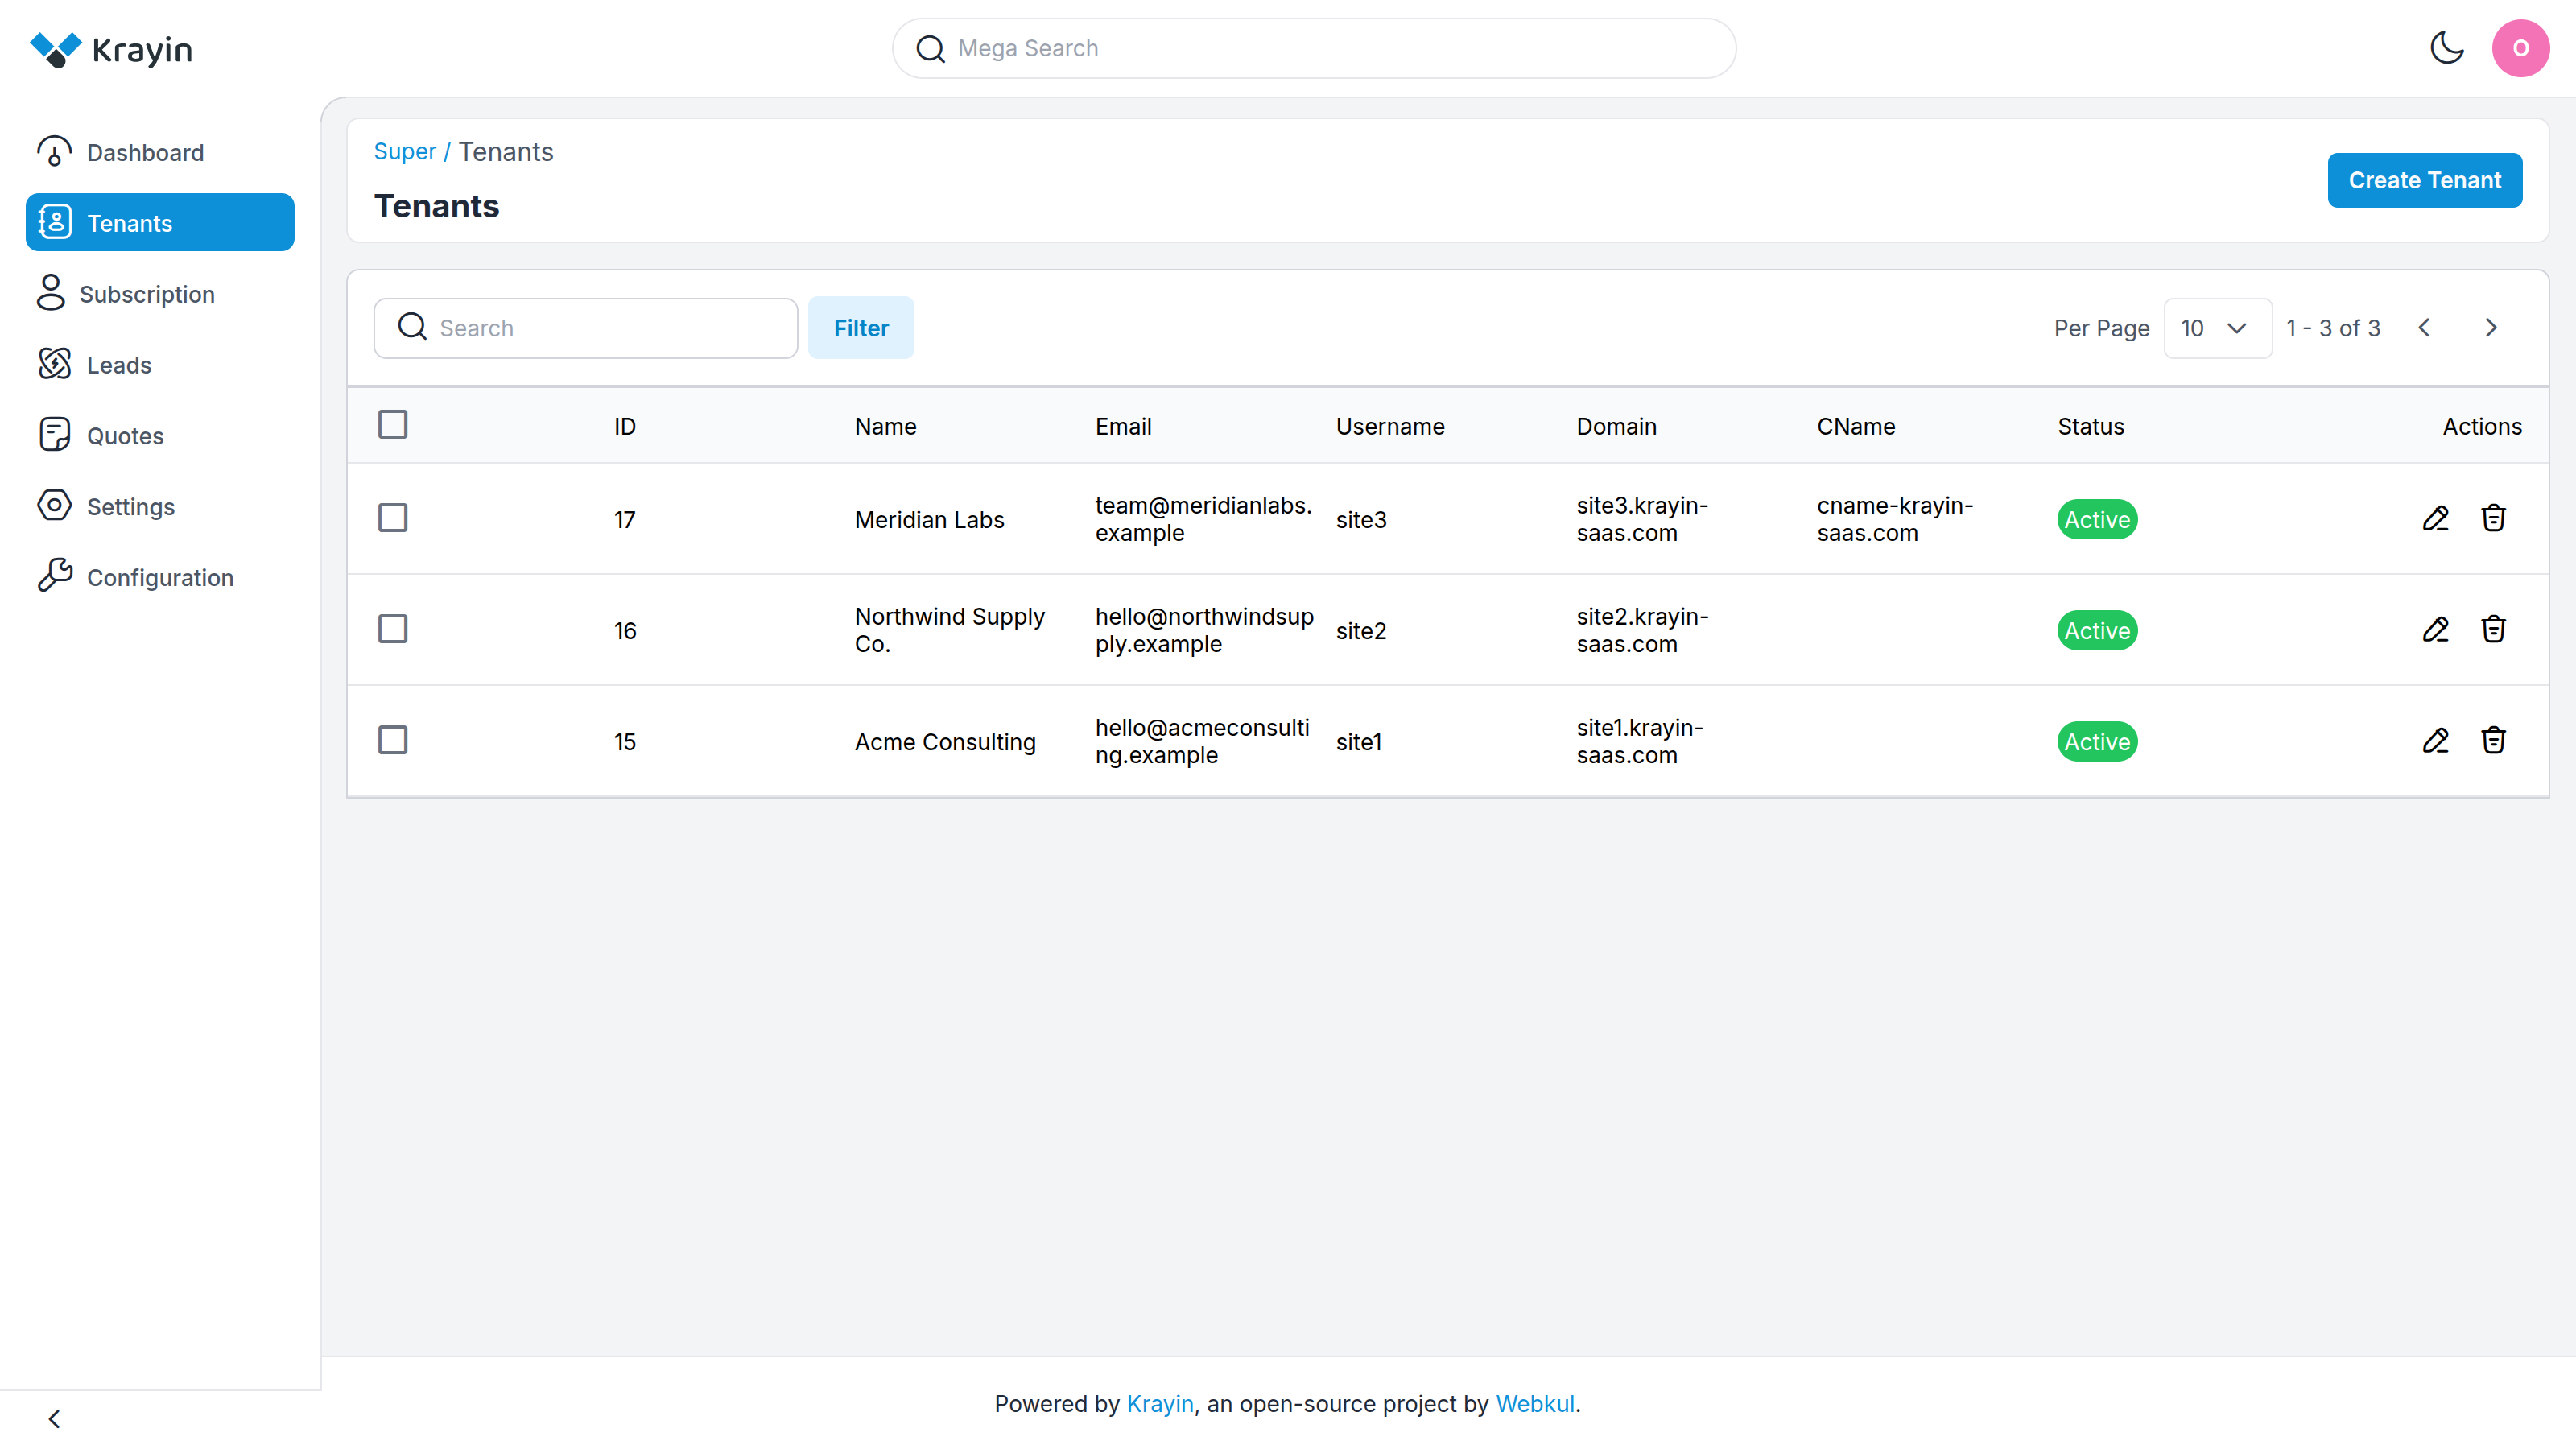
Each row shows:
- ID — the tenant's internal number.
- Name — the business name.
- Email — the address the account was opened with.
- Username — the subdomain label, so
site1meanssite1.yourplatform.com. - Domain — the full CRM address.
- CName — a custom domain, if the tenant has pointed one at the platform. Blank otherwise. See Custom Domains.
- Status — Active or Inactive.
Use Search to find a tenant by name or email, Filter to narrow by status, and Per Page to show more rows at once.
TIP
Most tenants create themselves by signing up — see Registration. You usually only come here to manage the ones that already exist.
Creating a tenant
Select Create Tenant to open a tenant on someone's behalf — useful when you're setting an account up for a customer directly.
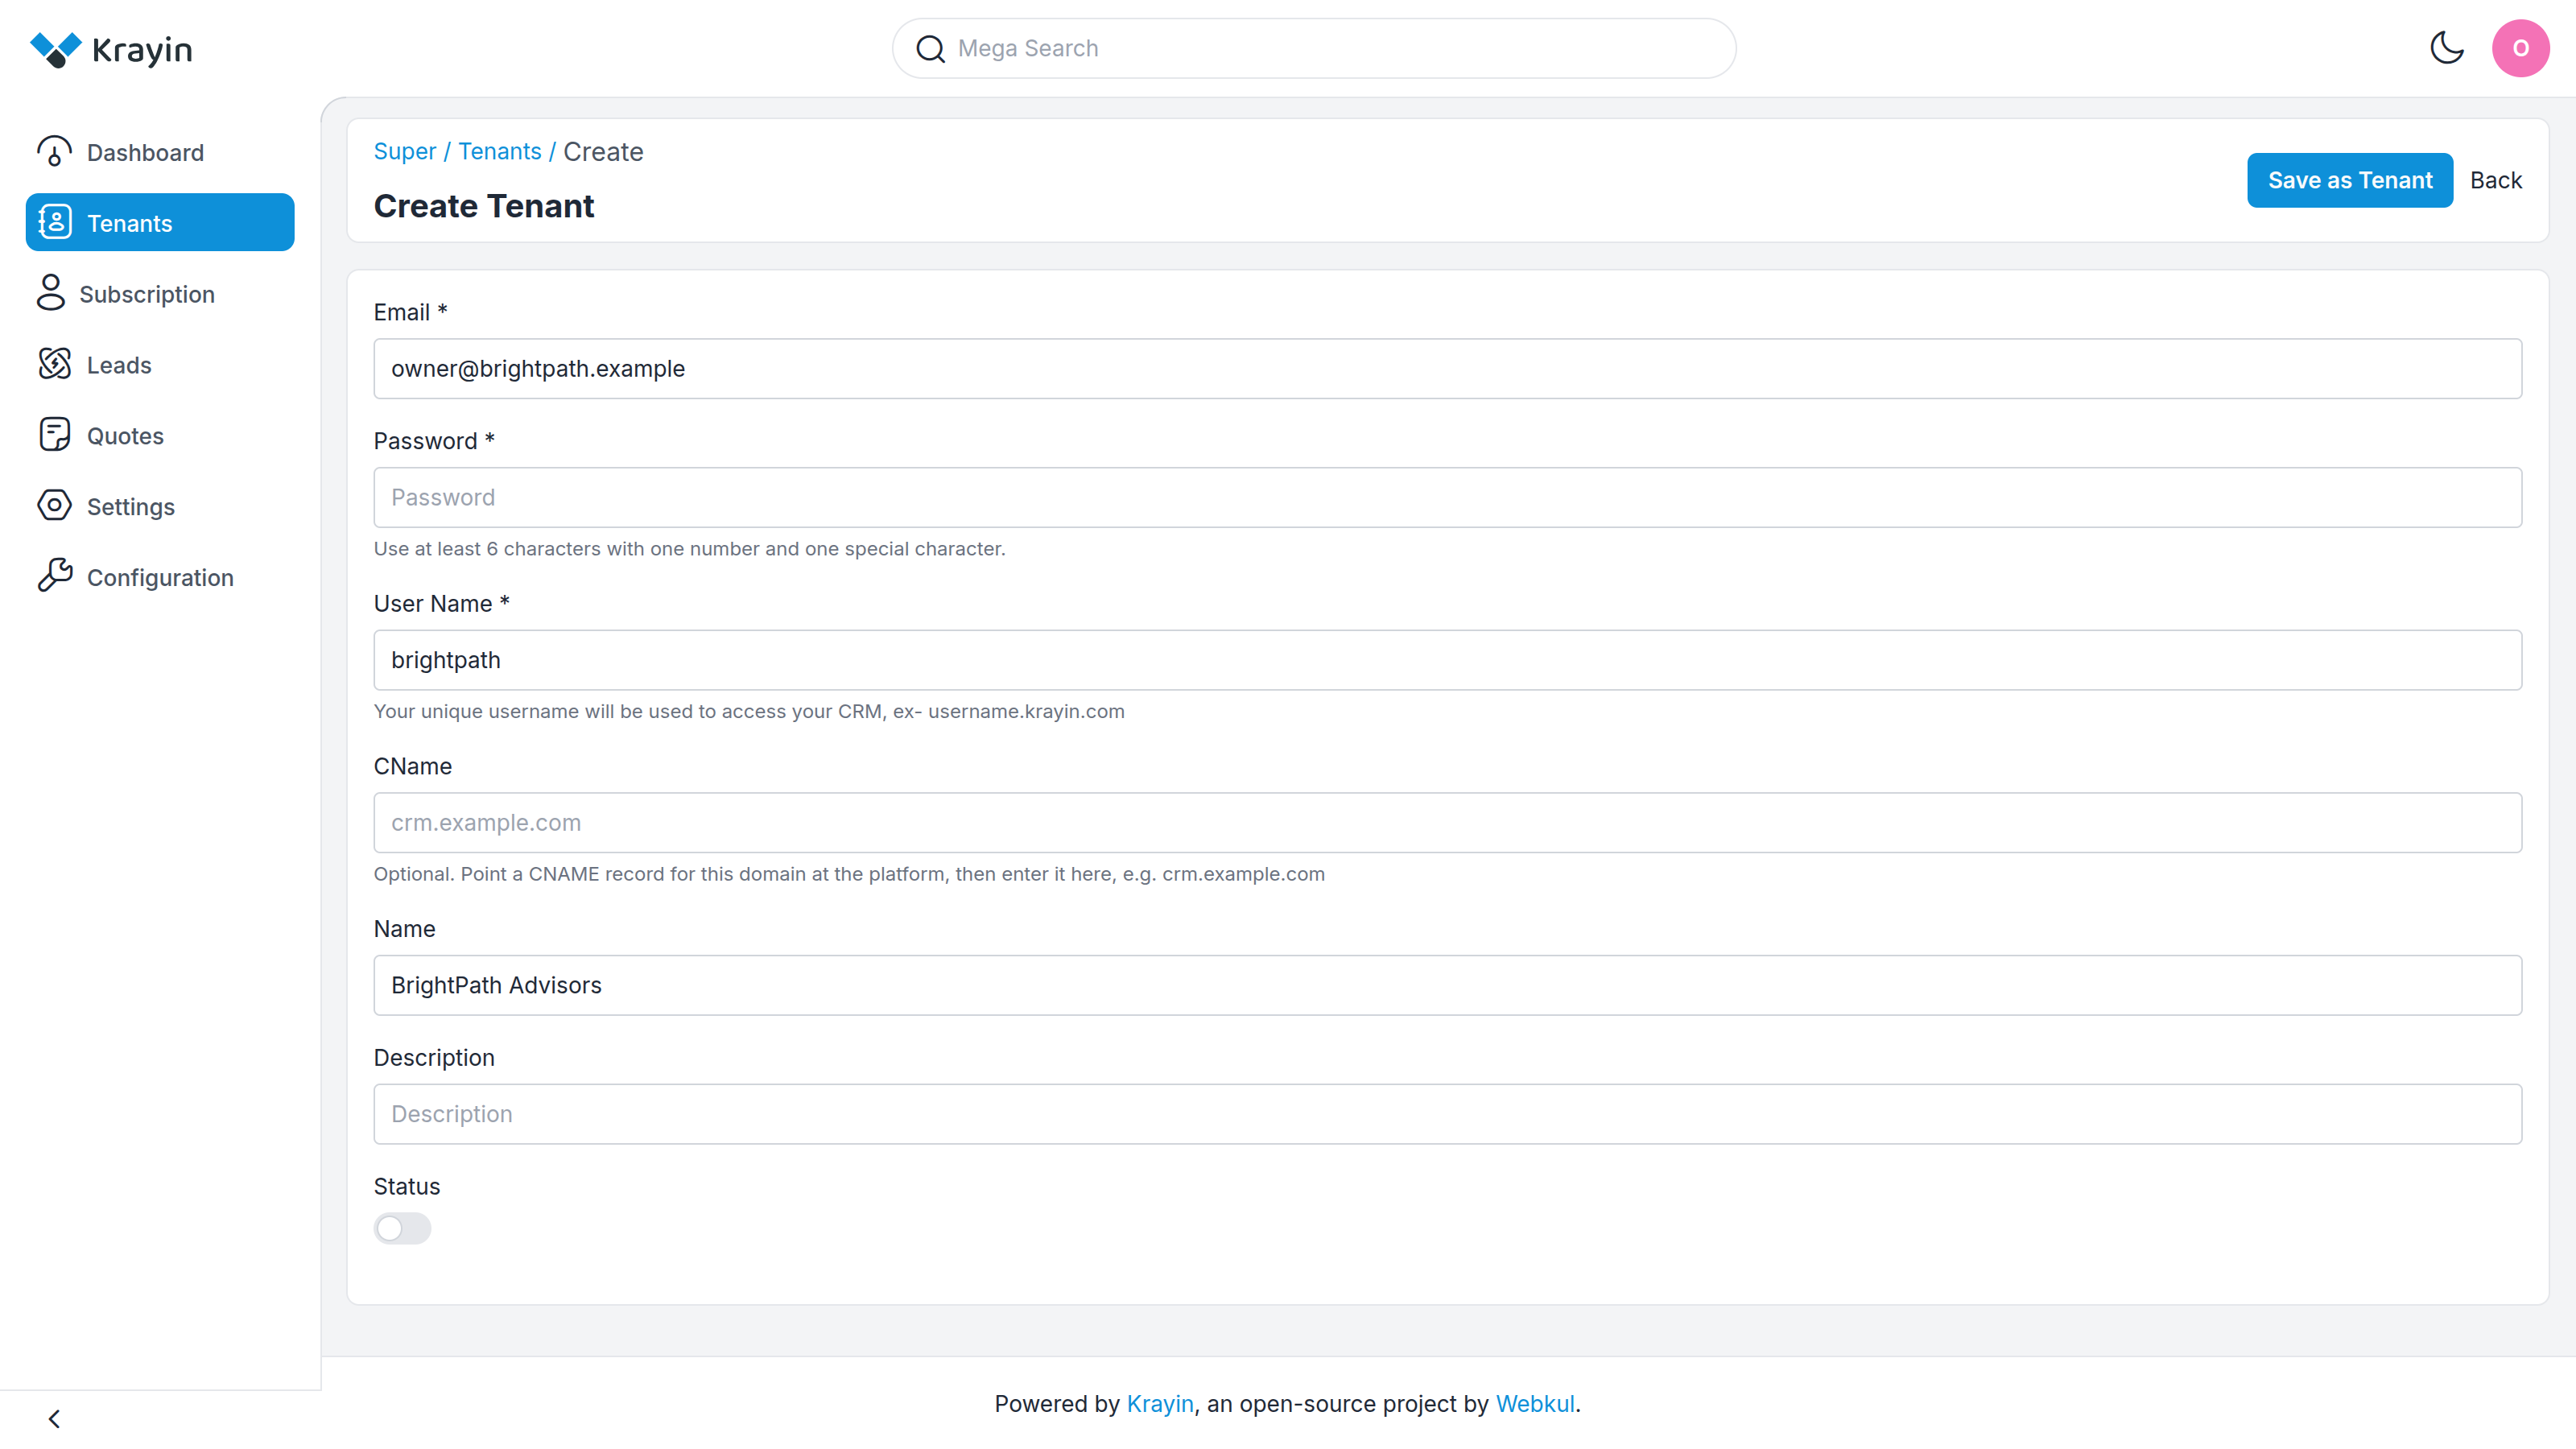
- Email (required) — the tenant admin's sign-in address. Must be unique.
- Password (required) — at least 6 characters, with one number and one special character.
- User Name (required) — becomes the subdomain, so
acmegivesacme.yourplatform.com. Lowercase letters, numbers and single hyphens only. - CName (optional) — a custom domain to serve the CRM from, entered as a bare hostname like
crm.example.com— nohttp://, no trailing path. Each domain can belong to only one tenant. - Name — the business name (optional; can be added later).
- Description — a note for your own reference (optional).
- Status — leave off to create the tenant blocked, or turn it on to let them sign in straight away.
Select Save as Tenant. Their CRM is provisioned immediately — pipelines, roles and starter data are all set up, exactly as if they had registered themselves.
Editing a tenant
The pencil icon on a row opens the same form pre-filled. You can change the name, email, custom domain and status. The Password field is optional here — leave it blank to keep the current one, or enter a new one to reset it.
Blocking a tenant
Turning a tenant's Status off — on the edit form, or by selecting rows and using the bulk status action — blocks them.
A blocked tenant:
- can no longer sign in, on either their subdomain or their custom domain;
- keeps all their data untouched;
- still appears in this list, and in the Blocked Tenants figure on the dashboard.
Turn Status back on to restore access. Nothing is lost in between.
TIP
Blocking is the reversible way to suspend an account — for non-payment, say. Reach for it before you reach for delete.
Deleting a tenant
The trash icon removes a tenant.
WARNING
Deleting a tenant is permanent. Their CRM, and every lead, contact and quote inside it, is gone and cannot be recovered. To suspend an account temporarily, block it instead.
Where to go next
- See what a tenant's leads and quotes look like from your side → Leads · Quotes
- Understand what a tenant gets on sign-up → The Tenant Workspace
- Set a tenant up with their own domain → Custom Domains