

Agents & Roles
Everyone who signs in to the super-admin panel alongside you is an agent, and what each agent can do is decided by their role. Together they let you bring colleagues in to help run the platform without handing everyone the keys.
What you'll learn
- How to add an agent and assign their role
- How to build a role from the permission tree
- The rules that stop you locking yourself out
Roles come first
A role is a named bundle of permissions. Because every agent must be given a role when you create them, it's easiest to set the roles up first.
Open Settings → Roles.
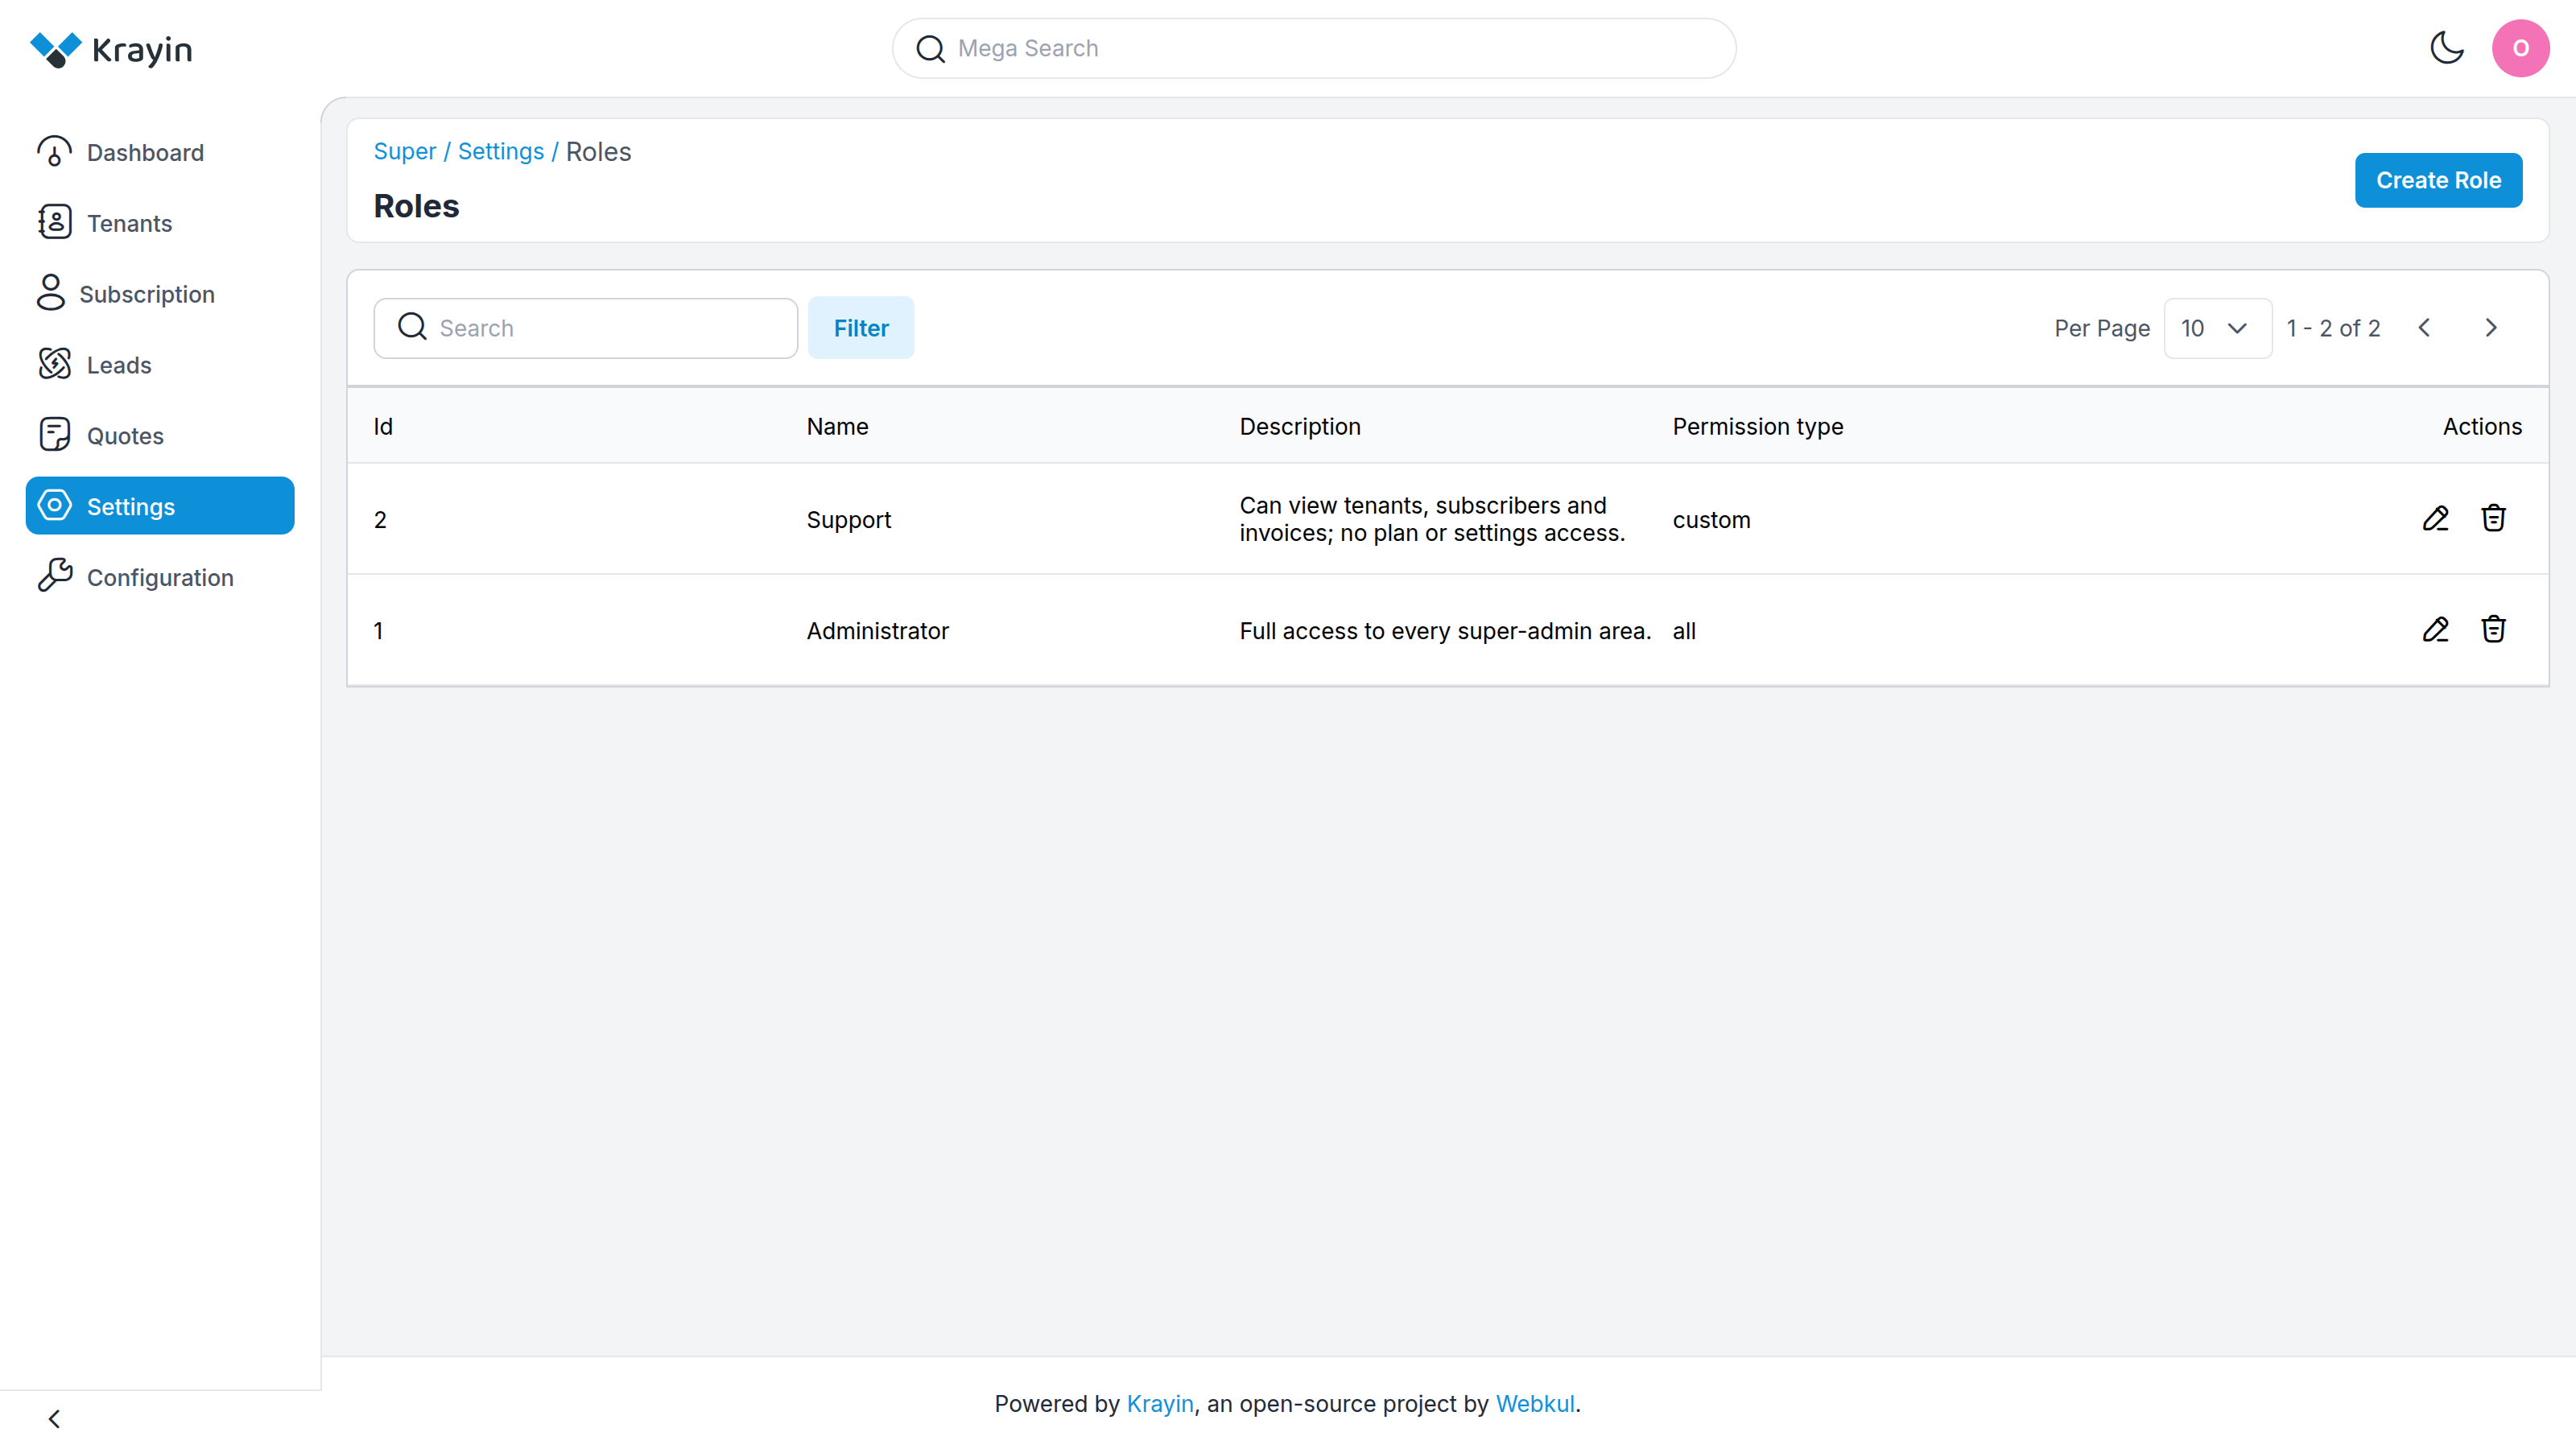
Each row shows the role's Name, its Description, and its Permission type — all for full access, or custom for a hand-picked set.
TIP
A fresh install ships with a single Administrator role that has every permission. Leave it as the all-access role and create narrower roles beside it.
Creating a role
Select Create Role.
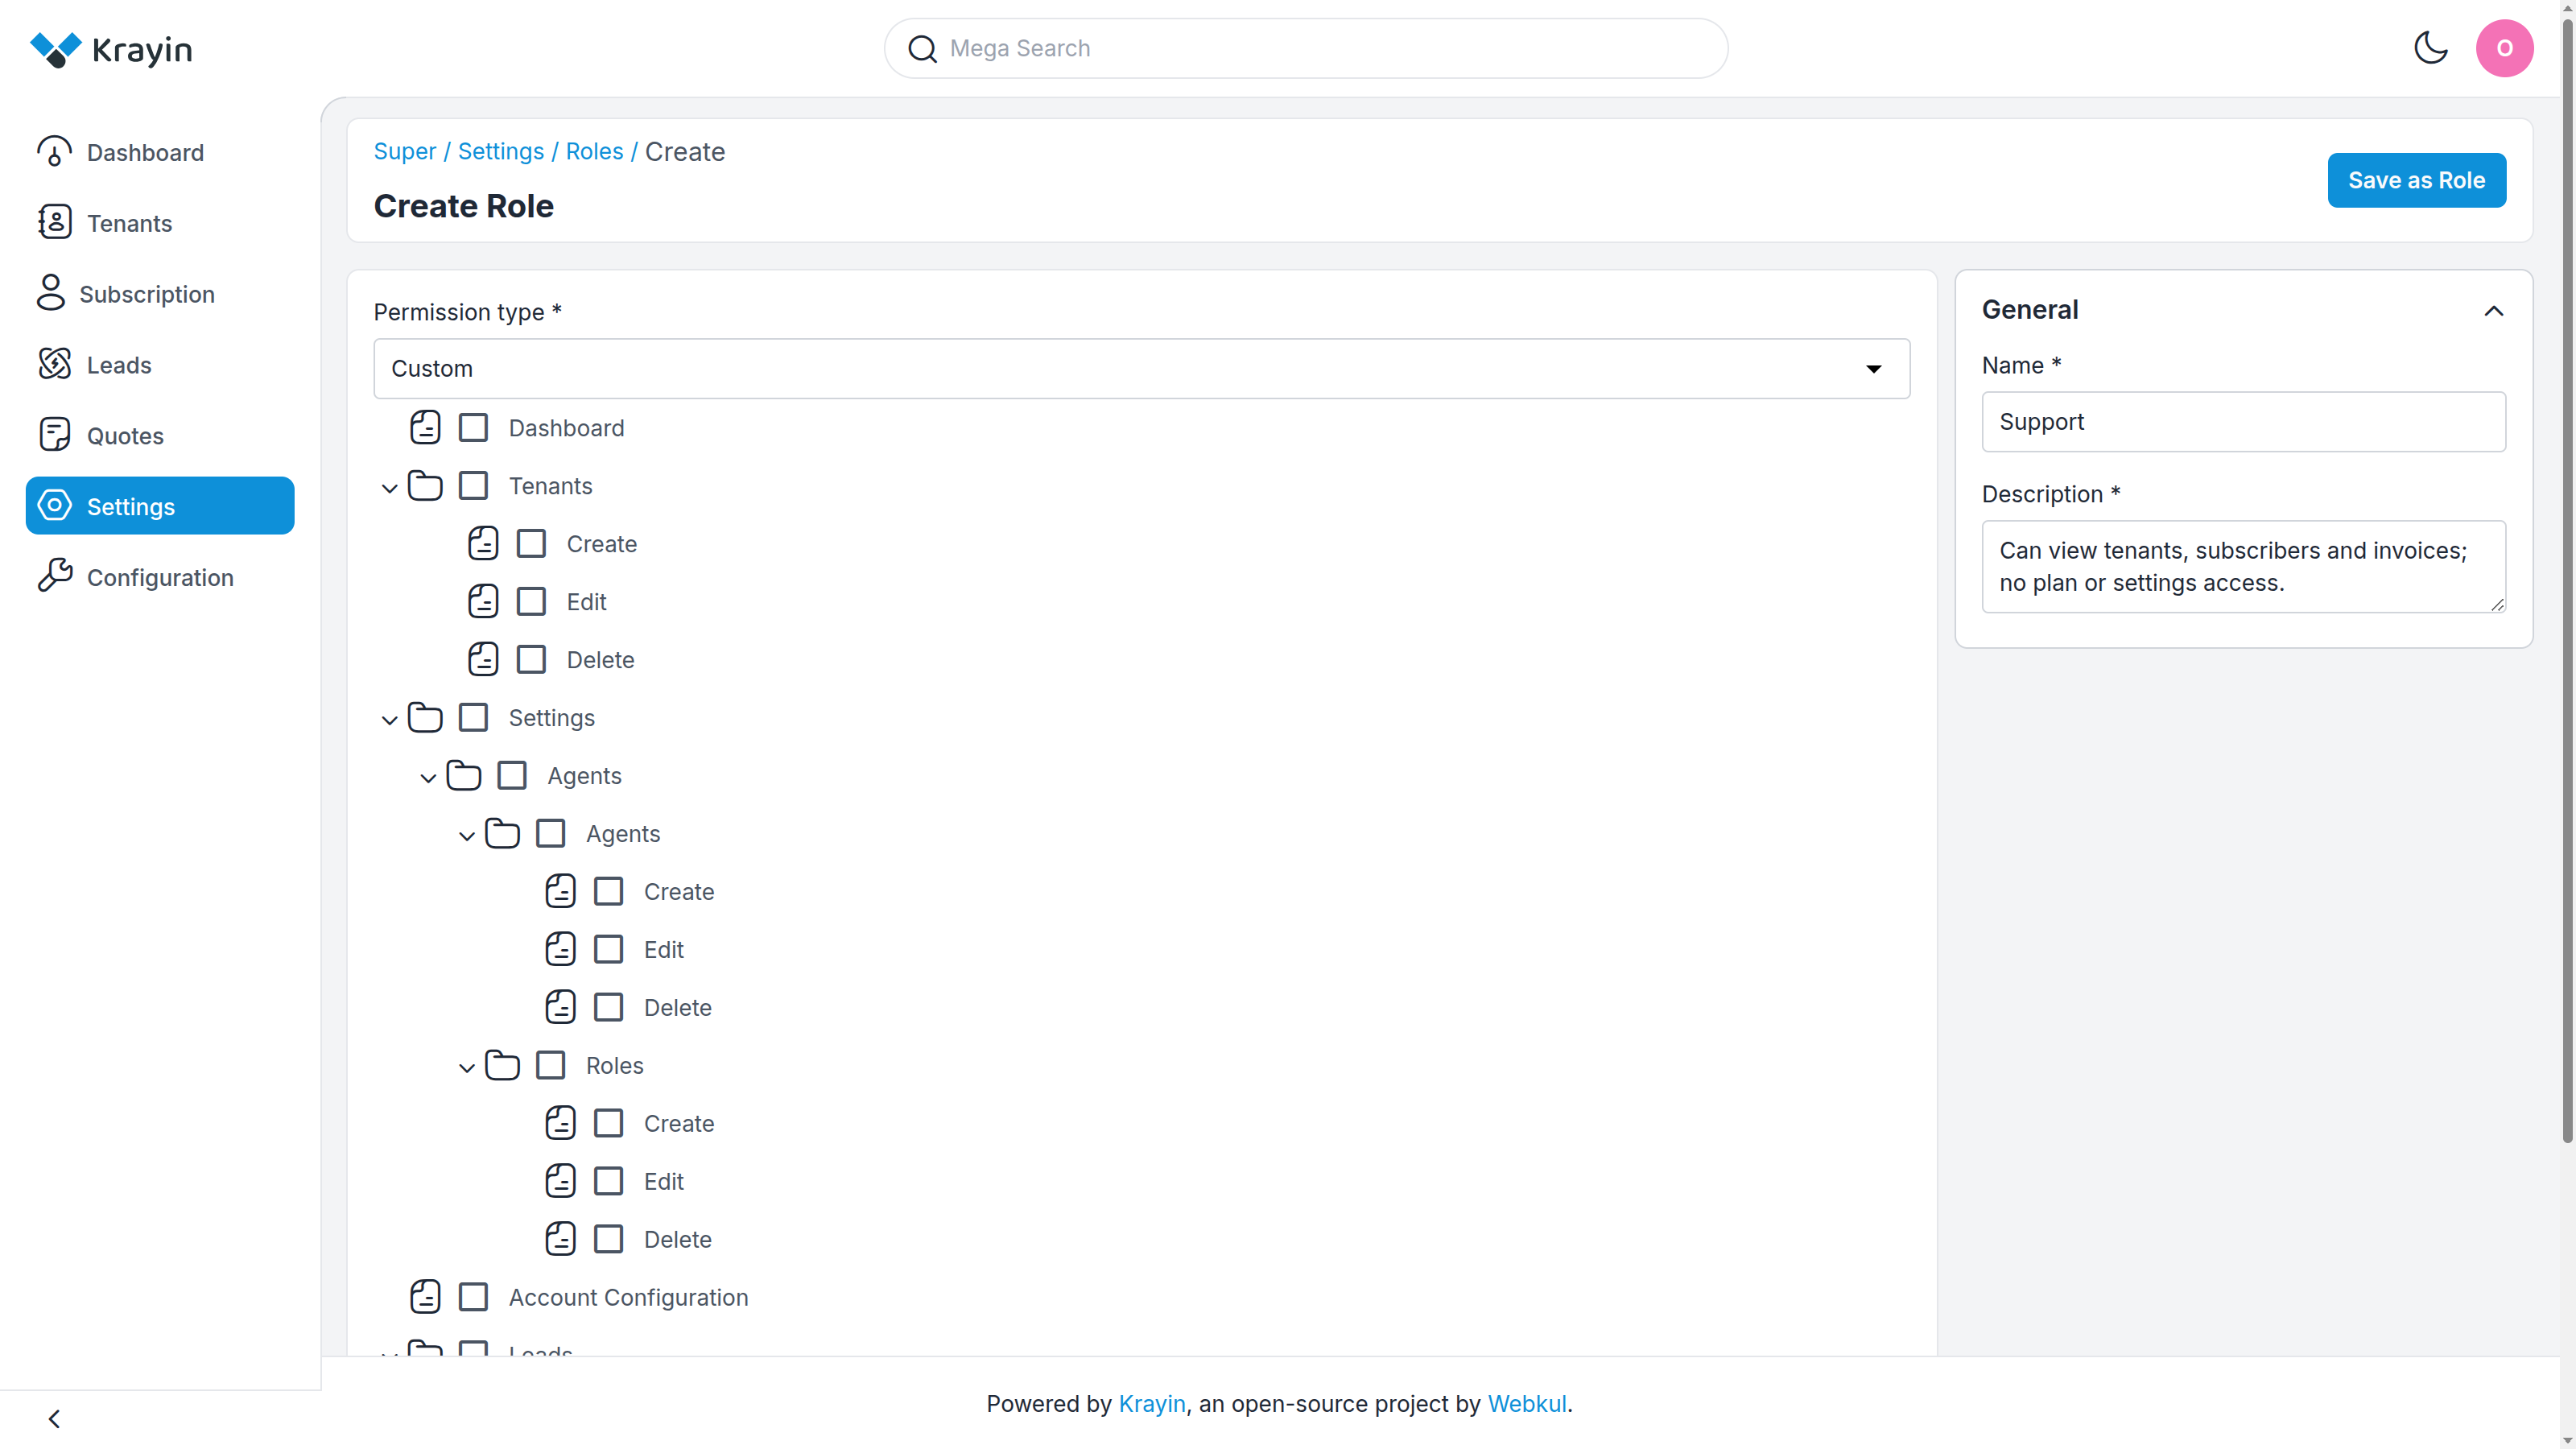
- Name (required) — what the role is called, e.g. Support.
- Description (required) — a line explaining what it's for.
- Permission type (required) — choose All to grant everything, or Custom to pick.
Choosing Custom reveals the permission tree. Tick exactly what this role should be able to do:
- Dashboard — see the dashboard.
- Tenants — Create, Edit, Delete tenants.
- Settings → Agents / Roles — Create, Edit, Delete other agents and roles.
- Account Configuration — reach the Configuration screen.
- Leads — Edit, Delete cross-tenant leads.
- Quotes — Edit, Delete cross-tenant quotes.
Ticking a parent selects everything under it. Select Save as Role when you're done.
Adding an agent
With the roles in place, open Settings → Agents.
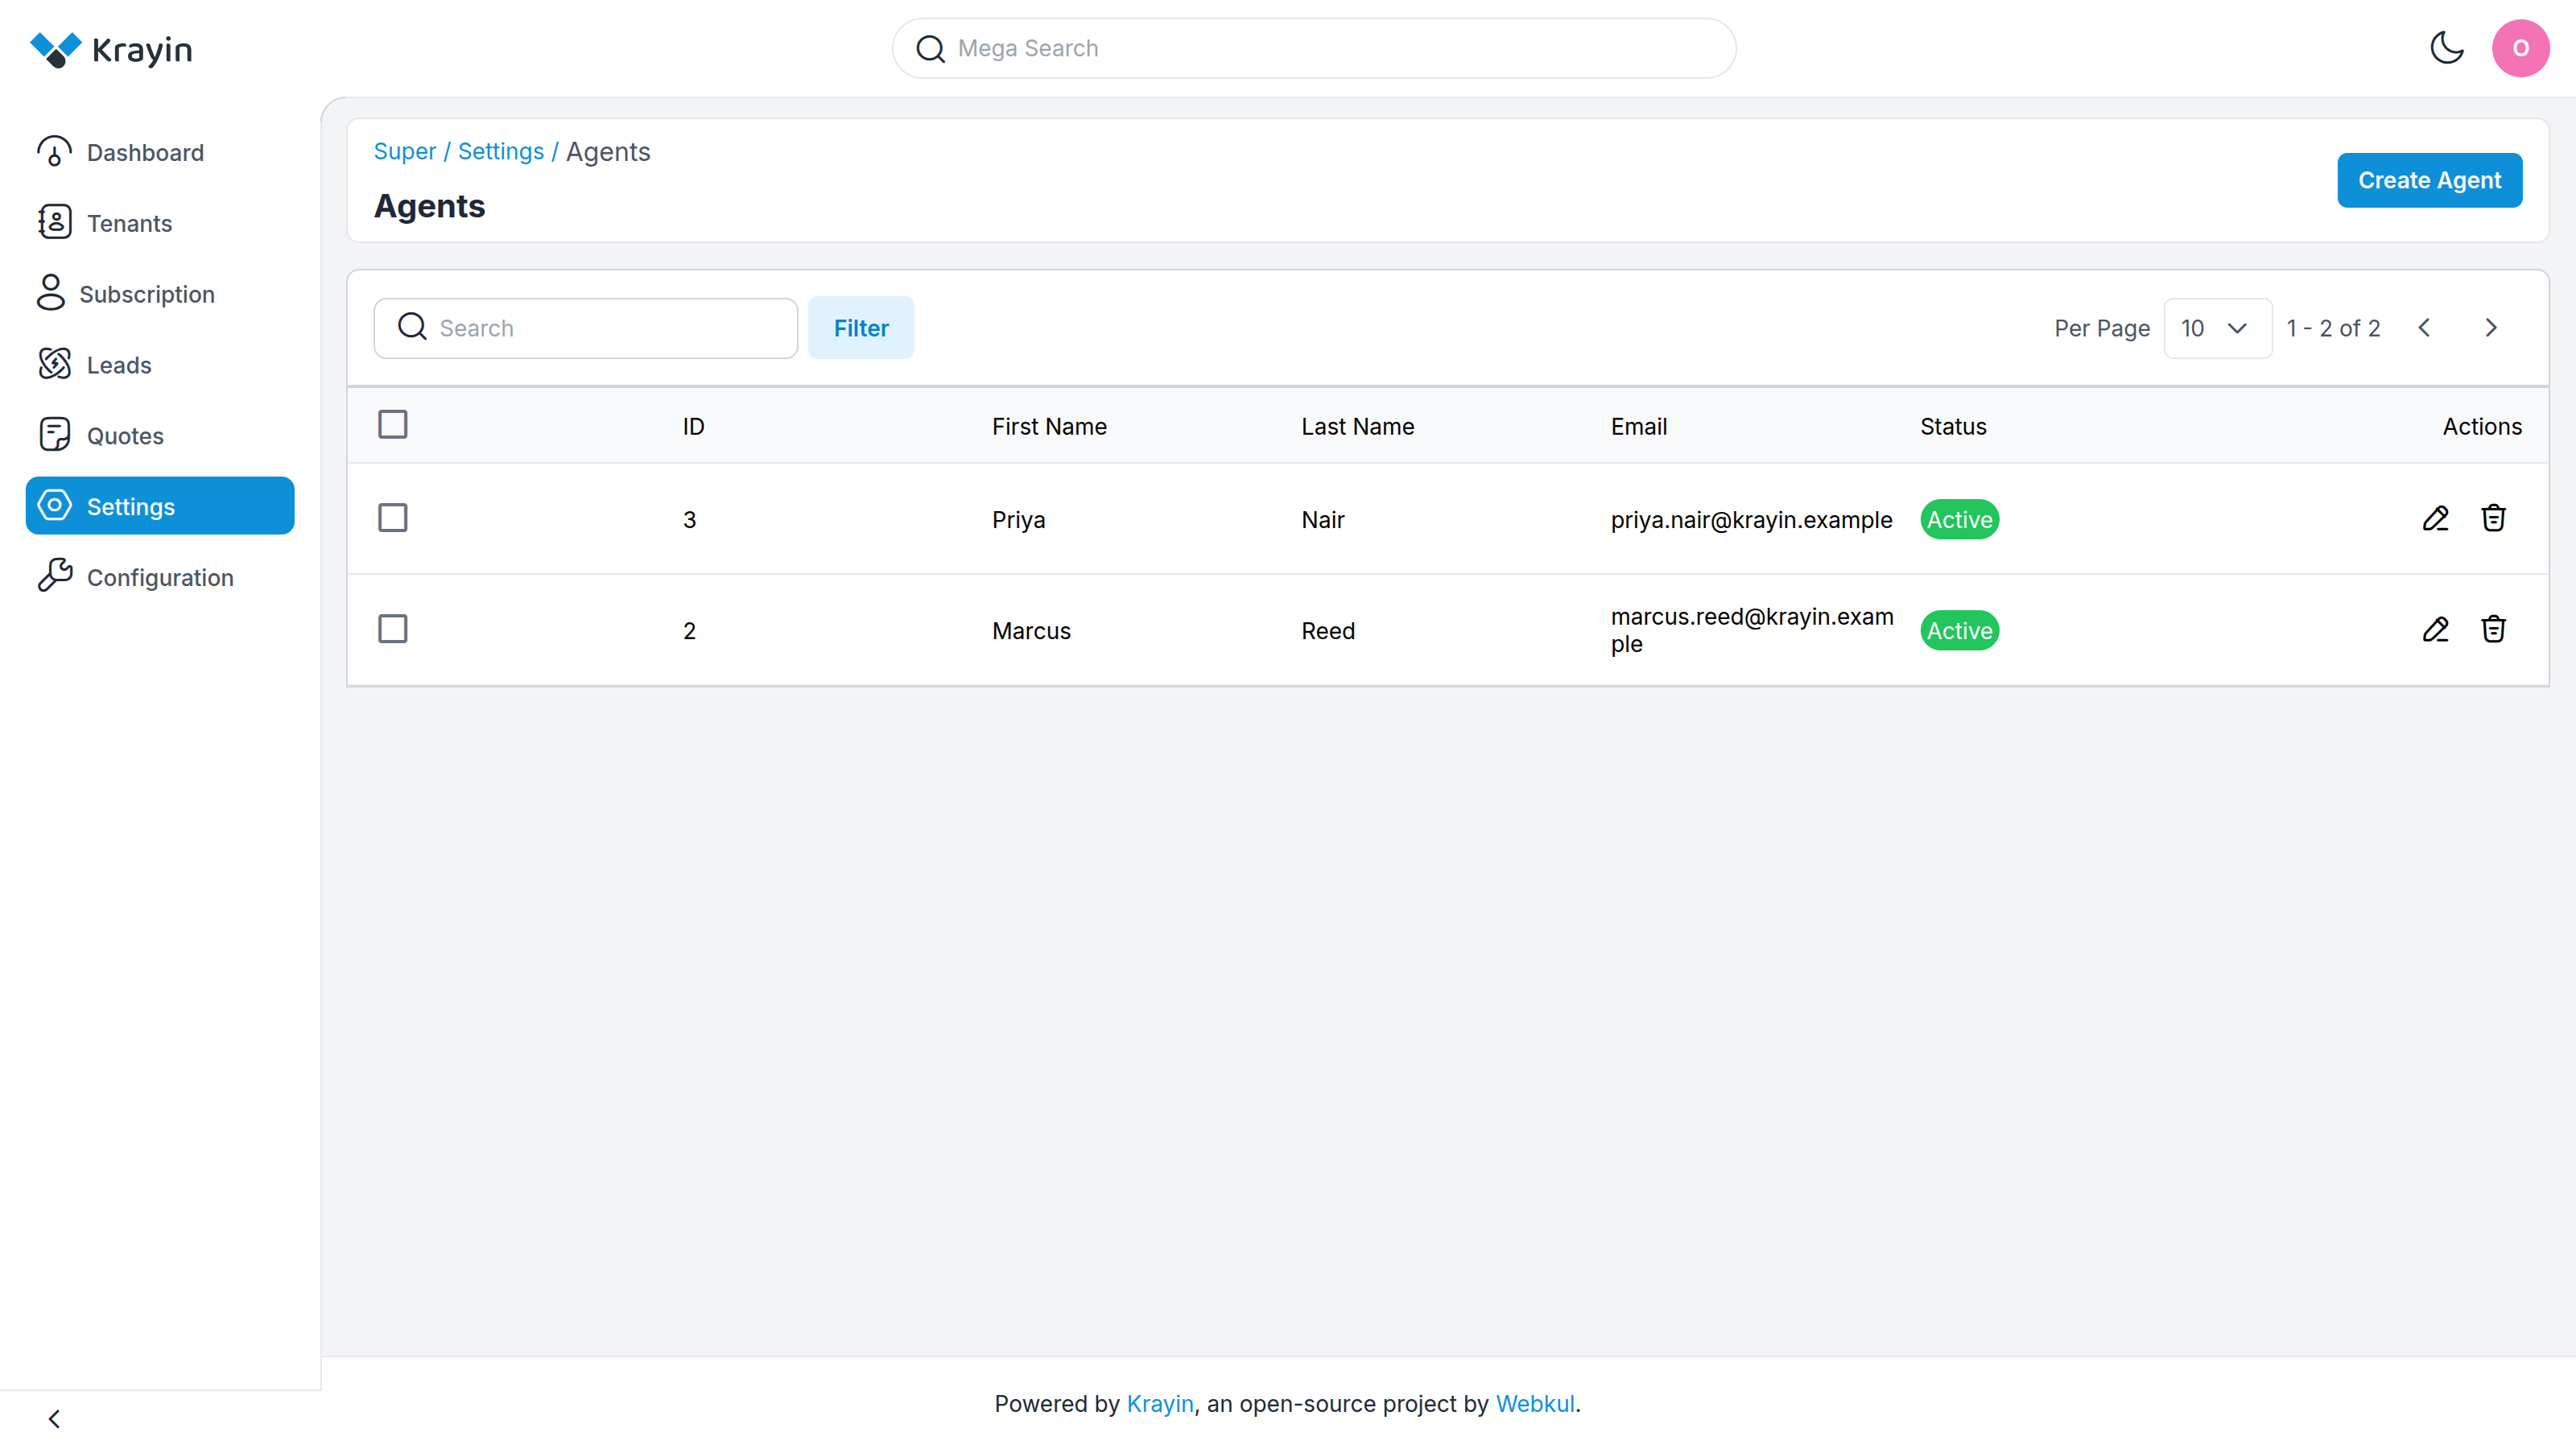
The grid lists each agent's ID, First Name, Last Name, Email and Status.
TIP
The platform's original super-admin account isn't shown in this grid — it's the built-in owner account and can't be edited or removed from here. The agents you add appear below it.
Select Create Agent.
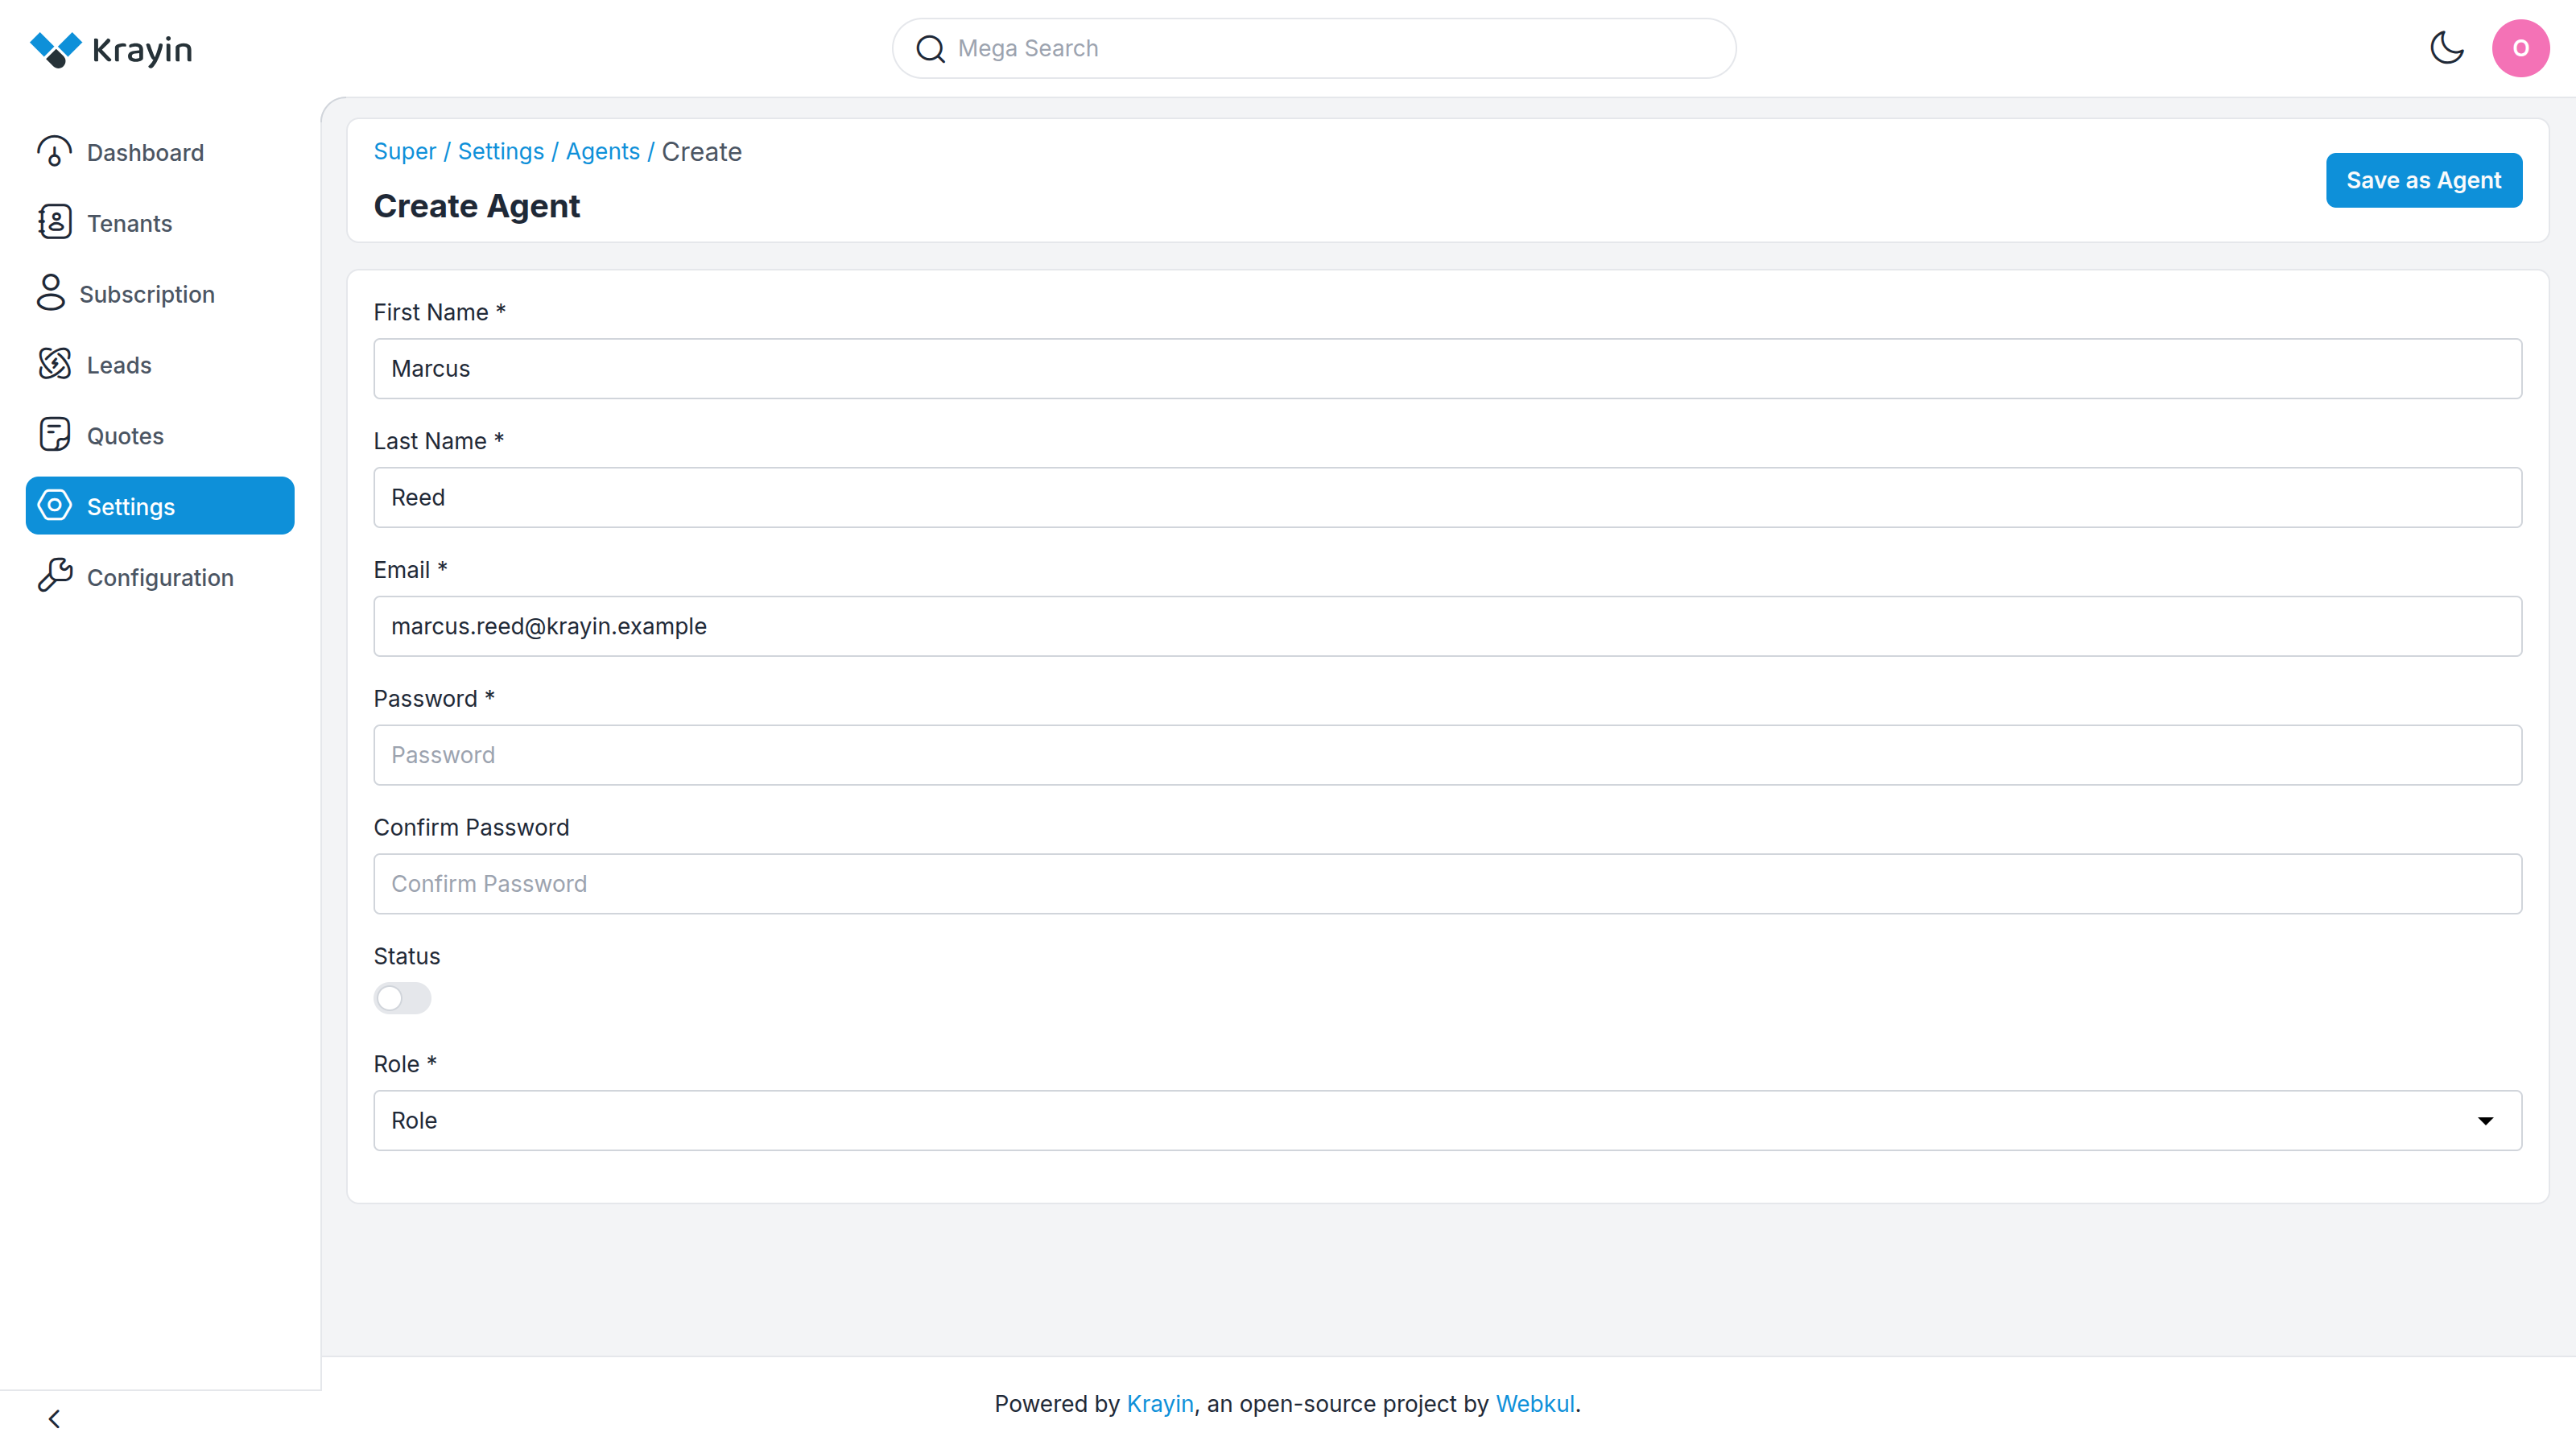
- First Name / Last Name (required) — the agent's name.
- Email (required) — their sign-in address. Must be unique across all agents.
- Password (required) — at least 6 characters.
- Confirm Password (required) — must match Password.
- Status — turn on to let them sign in. Left off, the account exists but is blocked.
- Role (required) — the role that decides what they can do.
Select Save as Agent. They can now sign in at /super/login with the email and password you set, and they'll see only the areas their role allows.
Editing and removing
The pencil icon on either grid re-opens the record. On the agent edit form the Password fields are optional — leave them blank to keep the current password, or fill them in to reset it.
The trash icon deletes an agent or role, with two guards on roles:
WARNING
- A role that's assigned to any agent can't be deleted — "Role can not be deleted, as this is being used in admin user." Move those agents to another role first.
- You can't delete the last remaining role, or the role assigned to you right now. These rules exist so the platform always has at least one working way in.
Where to go next
- Configure Stripe, trials and locale → Configuration
- The screens these roles grant access to → Dashboard · Tenant Management